Welcome to RestIt
RestIt is a lightweight, native API client built for developers who prefer speed and simplicity, RestIt runs natively on your computer with no online dependencies.
- ✅ No sign-up required
- ✅ No cloud dependency
- ✅ Your data stays local
Because it’s built natively for each platform, RestIt offers:
- Minimal application size
- Low runtime memory consumption
- Fast performance without unnecessary overhead
RestIt is available across Windows, macOS, and Linux, making it a reliable companion for testing, debugging, and working with REST APIs in a clean, efficient environment.
🚀 Features
- Cross-platform (Windows, macOS, Linux)
- 100% local application — no account or internet required
- Native UI with low memory footprint
- Fast and responsive performance
- Simple, distraction-free workflow
- Flexible layout
📥 Getting Started
Download the latest version of RestIt for your platform from the
👉 Download Page
Once downloaded install the app, run the app and start sending requests.
📁 Collections
Collections are folders where you organize and store your API requests.
They also allow you to define collection-level variables and authentication data that apply to all requests within the collection.
You can create a new collection in multiple ways:
✨ Creating a New Collection
- Via Menu:
File → New → New Collection - Using Keyboard Shortcut:
- Windows/Linux:
Ctrl + N - macOS:
Cmd + N
- Windows/Linux:

In the popup dialog, simply enter a name and an optional description, then click Save. Your new collection will now appear in the Collections panel.
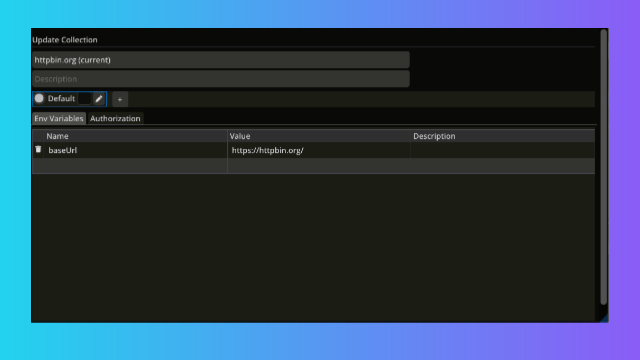
Snapshot: Collection Details Dialog
🌐 Collection-Level Environment Variables
RestIt supports collection-level environment variables, which are shared across all requests within a collection.
All variables belong to a profile, and each profile contains its own set of variables.
👉 To use environment variables, you first need to create a Profile.
🆕 Creating a Profile (Environment)
When creating a new collection:
- Click the ➕ button in the Environment section.
- Enter a profile name (e.g.,
Dev,Production,Staging). - Click Save.
When working with an existing collection:
- Right-click the collection in the sidebar.
- Select
View/Edit. - Create or update profiles as needed.
⚙️ Managing Profiles & Variables
- After creating a profile, you can define variables such as tokens, base URLs, or credentials.
- You can create multiple profiles per collection (e.g.,
Dev,QA,Prod). - Only one profile can be active at a time.
- All requests within the collection automatically use the active profile's variables.
🖱️ Viewing Active Profile Details
When you hover over a collection in the sidebar, a tooltip appears showing:
- The currently selected profile name
- The list of variables defined in that profile
This makes it easy to confirm which profile is active and what values are being applied to your requests at a glance.
🗑️ Deleting a Collection
To delete a collection, click Delete in the collection's options menu.
📤 Importing or Exporting a Collection
For details on importing or exporting collections, see the Import/Export section.
📤 Importing and Exporting Collections
RestIt supports seamless import and export of collections from Postman, Insomnia, OpenAPI (YAML), and RestIt itself.
🆕 Importing Collections
You can import collections in two convenient ways:
-
Via Menu
Go toFile → Importto open the import dialog.
Or use the keyboard shortcut:- Windows/Linux:
Ctrl + I - macOS:
Cmd + I
- Windows/Linux:
-
Drag and Drop
Simply drag your collection file onto the RestIt window to initiate import.
RestIt will automatically detect the import type—whether it's from Postman, Insomnia, OpenAPI, or a native RestIt collection.
Supported formats:
.json(Postman, Insomnia, RestIt) and.yaml/.yml(OpenAPI)
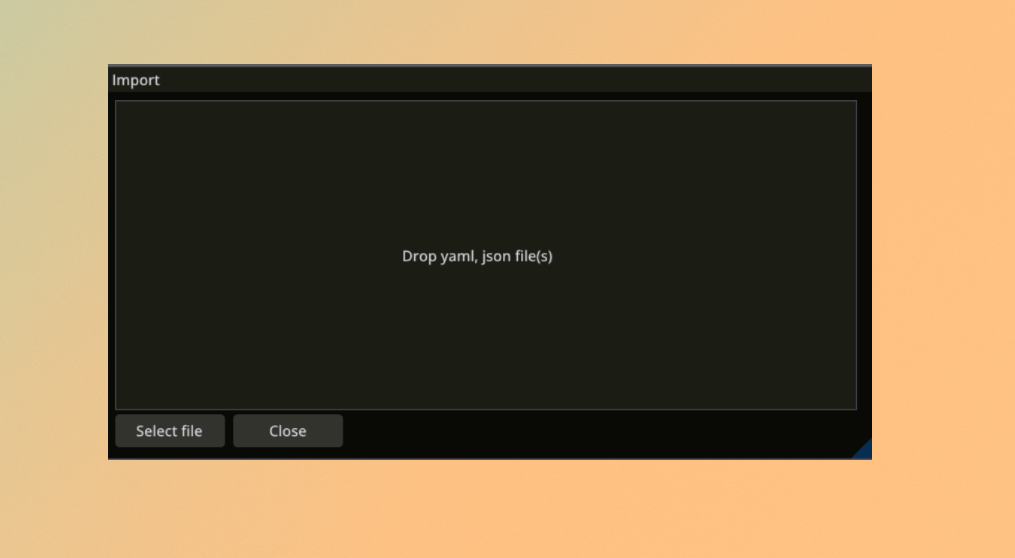
Snapshot: The Import Dialog
📥 Exporting Collections
To export a collection:
- Right-click on the desired collection in the sidebar.
- Select
Exportfrom the context menu.
The exported file will be in JSON format, compatible with RestIt.
This cross-compatibility helps you move quickly between tools while keeping everything local, clean, and fully under your control.
🌐 Variables in RestIt
🧪 Environment Variables
In RestIt, environment variables are scoped per collection.
To manage them:
- Right-click the collection in the sidebar.
- Select View/Edit to open the variable manager.
All variables are grouped under an Environment Profile.
You must have at least one profile before adding variables.
🗂️ Environment Profiles
Each collection includes one or more profiles that store:
- Environment variables
- Authorization credentials
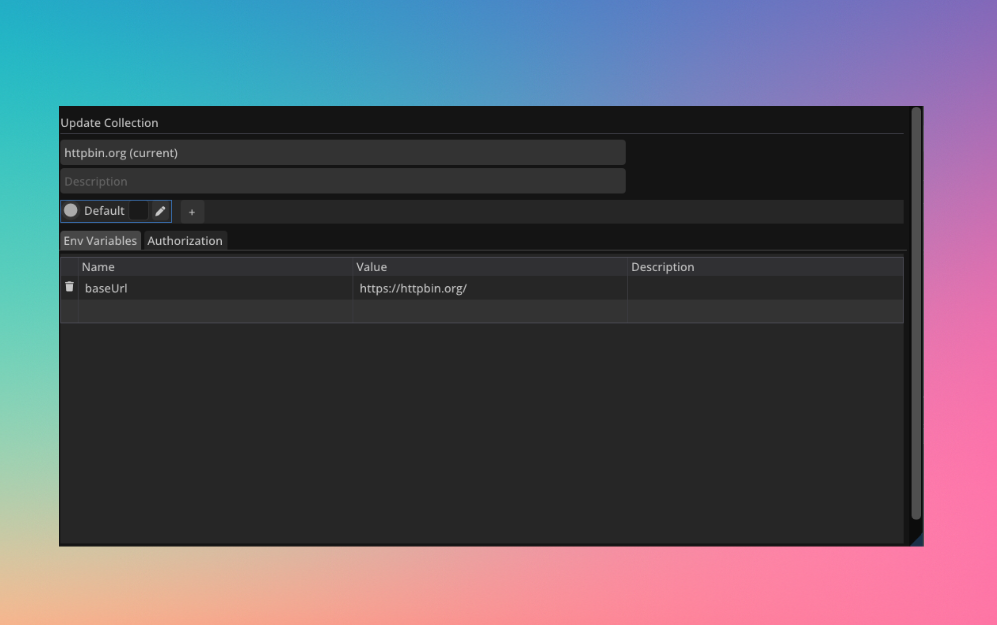
➕ Creating a New Profile
- Click the
+icon next to profiles. - Enter a name (e.g.,
Dev,Staging,Prod) and choose a color. - Click Save.
📝 Adding Variables
Once a profile is created, you can add variables:
- Specify a name and value.
- Click Save.
💡 Tip: Use separate profiles for development, staging, and production environments to switch between them easily without editing your requests.
📥 Using Environment Variables in Requests
You can use environment variables in:
- URLs
- Headers
- Request bodies
- Query parameters
Use the syntax:
${variable_name}
🔧 Example
If your profile includes:
{
  "base_url": "https://api.example.com",
  "auth_token": "abc123"
}
Then you can write your request as:
GET ${base_url}/users
Authorization: Bearer ${auth_token}
RestIt will substitute the values from the active environment profile when sending the request.
🛣️ Path Variables
RestIt supports path variables, allowing you to define parts of the URL dynamically using the :variableName syntax.
✨ Example
GET /users/:userId/posts/:postId
RestIt will prompt you to provide values for userId and postId before executing the request.
Path variables are useful when request URLs change frequently, or when used with chaining or user input.
🔀 Combining Path and Environment Variables
You can combine environment variables and path variables within the same request for maximum flexibility.
🧪 Mixed Example
Suppose your environment profile defines:
  "base_url": "https://api.example.com",
  "auth_token": "xyz123"
You can use:
GET ${base_url}/projects/:projectId/tasks/:taskId
Headers:
Authorization: Bearer ${auth_token}
At runtime:
${base_url}and${auth_token}are substituted from the profile.:projectIdand:taskIdwill be prompted or filled from chained responses.
✅ Summary
| Feature | Syntax | Description |
|---|---|---|
| Environment Variable | ${variableName} | Pulled from active environment profile |
| Path Variable | :variableName | Prompted at request time |
| Combined Usage | ${base_url}/:userId/info | Mix profile + dynamic inputs in the same request |
📌 Both types of variables enhance reusability and flexibility across requests.
Looking to reference previous responses? See the Request Chaining guide for dynamic chaining.
Request Authentication
RestIt provides a flexible and powerful way to manage authentication at both the request and collection level.
🔐 Setting Authentication
To configure authentication for a request:
- Select your request tab.
- Navigate to the Authentication tab.
- Choose an authentication type and provide the necessary credentials.
✅ Supported Authentication Types
RestIt supports the following authentication mechanisms:
- Basic Auth – Uses a username and password.
- Bearer Token – Passes a token via the
Authorization: Bearer <token>header. - JWT Token – JSON Web Token support for secure API access.
- OAuth 2.0 – Secure delegated access via standard OAuth 2.0 flow.
📦 Collection-Level Authentication
You can apply authentication settings at the collection level, making it easy to manage shared credentials across multiple requests.
Within any request’s Authentication tab, you can:
- Inherit authentication from the parent collection.
- Override with custom authentication for the current request.
Tip: Use collection-level authentication to reduce redundancy and simplify updates when working with multiple authenticated endpoints.
🏃 Collection Runner
RestIt allows you to run all requests within a collection or folder effortlessly.
Getting Started
- Right-click on a collection or folder in the sidebar.
- Select
Runfrom the context menu.
Your selection will appear in the Collection Runner window, where you can:
- Include or exclude subfolders by toggling the
Include subfoldercheckbox. - Click Run to start executing all requests in sequence.
While the Collection Runner processes a sequence of requests, you can still execute individual requests independently—no need to wait for it to finish.
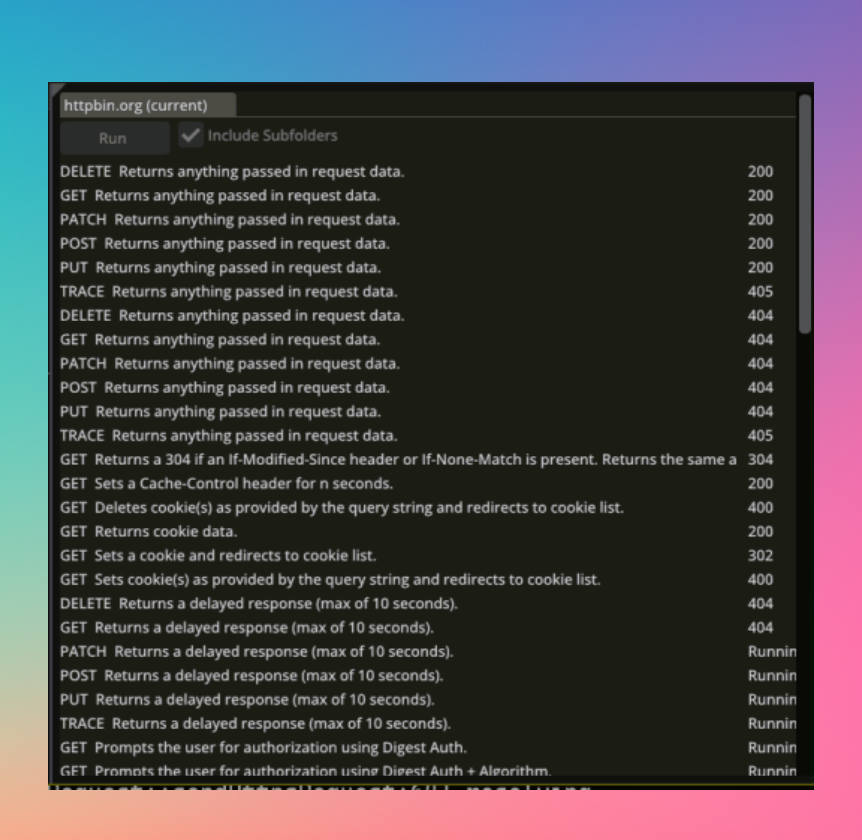
Snapshot: The Collection Runner window
🔗 Request Chaining in RestIt
💡 Tip: Use request chaining to pass dynamic values like tokens, IDs, or JSON attributes between requests—without manual copy-pasting or scripting.
📘 Overview
In API workflows, it's common for one request to depend on the response of another.
RestIt makes this easy with Request Chaining, allowing you to extract values from previous responses and reference them in subsequent requests.
🧩 Use Cases
- 🔐 Extract an auth token from a login response and use it in an
Authorizationheader. - 🆔 Capture an ID from a
POST /usersresponse and use it inPATCH /users/{id}. - 📦 Reuse entire response bodies in follow-up requests (e.g., download-then-upload workflows).
🛠 How to Use
1. Open the Request Editor
Navigate to your request and click into any of these fields:
- Headers
- Body
- Query Parameters
2. Select the Request_Chain type from the drop-down in value field and click on the field
2. Click inside the input area** to open the Request Chaining popup.
3. Choose the desired request** from the list.
4. Enter the JSON path** to extract the value you need.
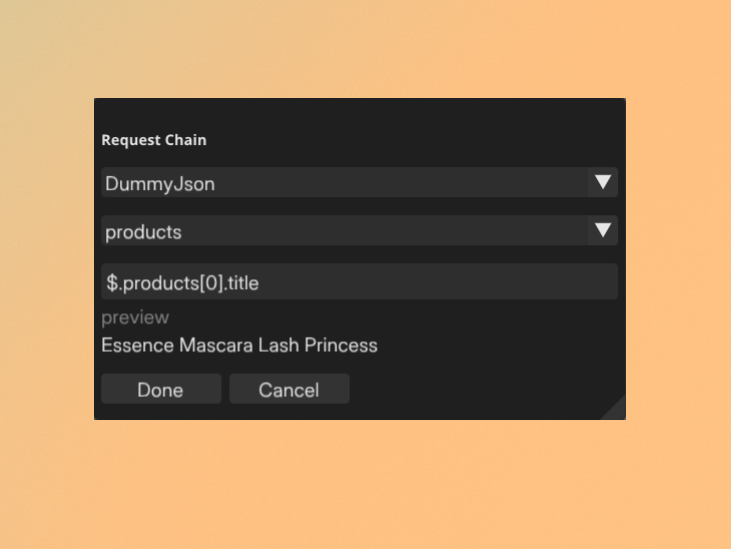
5. Preview the output** to ensure it returns the expected result.
This output will be used as the actual value while sending the request.
Shortcuts
This page lists all keyboard shortcuts available in RestIt.
💡 On macOS, use ⌘ Command instead of Ctrl for most shortcuts.
Requests
| Shortcut | Action |
|---|---|
| Ctrl + Enter | Send request |
| Ctrl + R | Rename selected request |
| Ctrl + D | Duplicate selected request |
| Delete | Delete selected request |
| F6 | Focus on URL input |
General
| Shortcut | Action |
|---|---|
| Ctrl + N | New Request/Collection |
| Ctrl + I | Open import dialog window |
| Ctrl + , | Open Settings window |
| F1 | Focus on Collections Panel |
| F2 | Focus on Requests Panel |
| F3 | Focus on Response Panel |